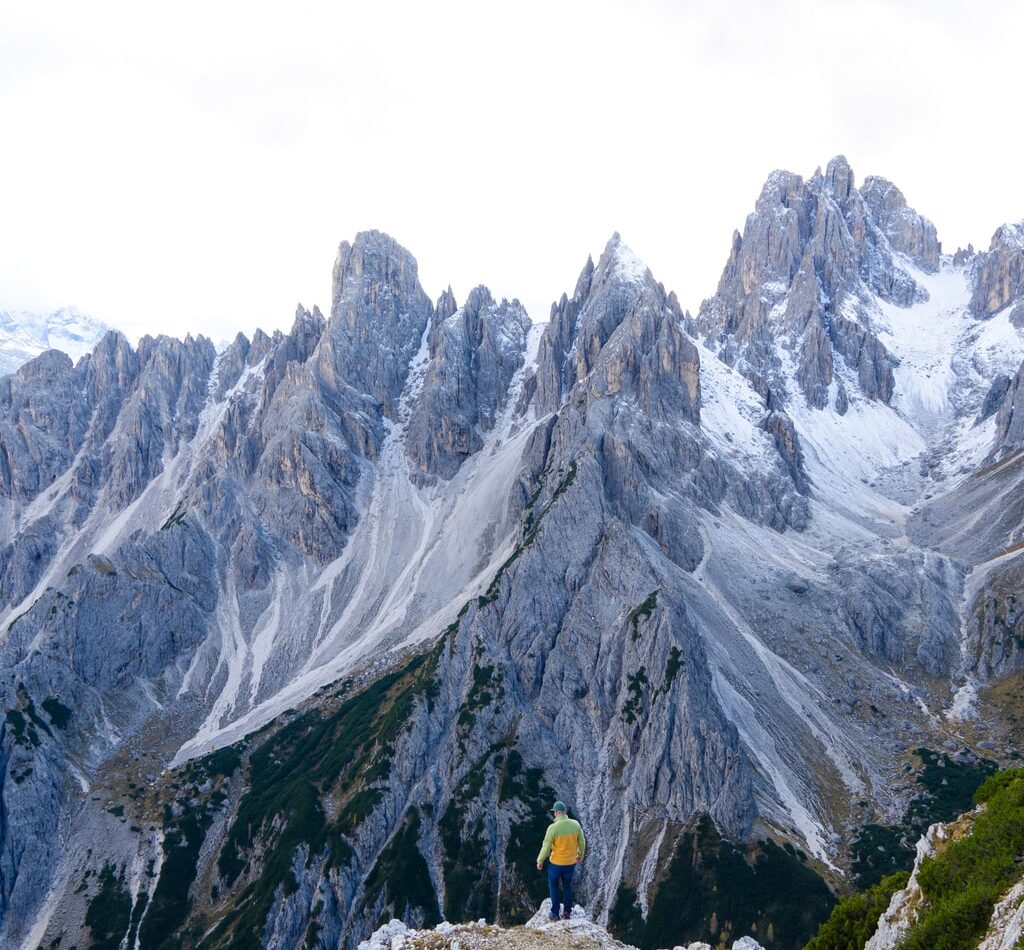
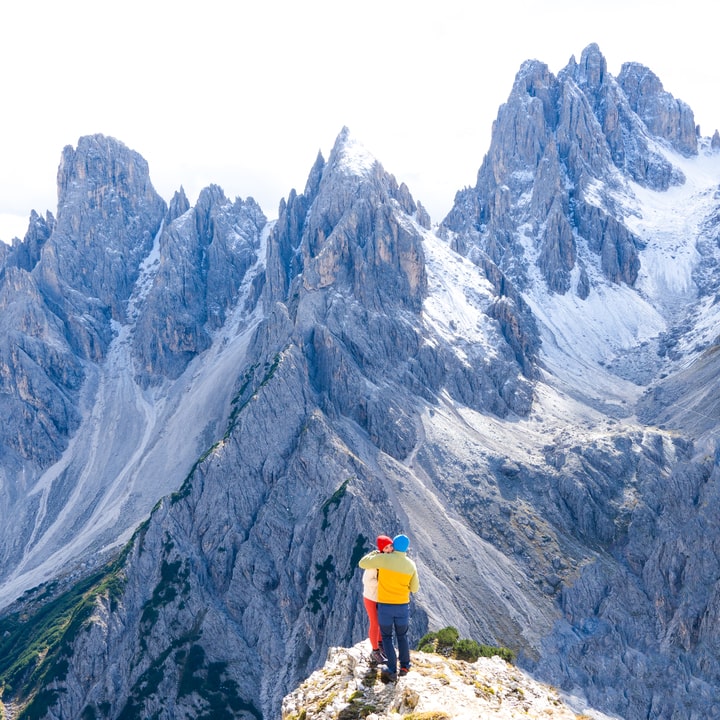
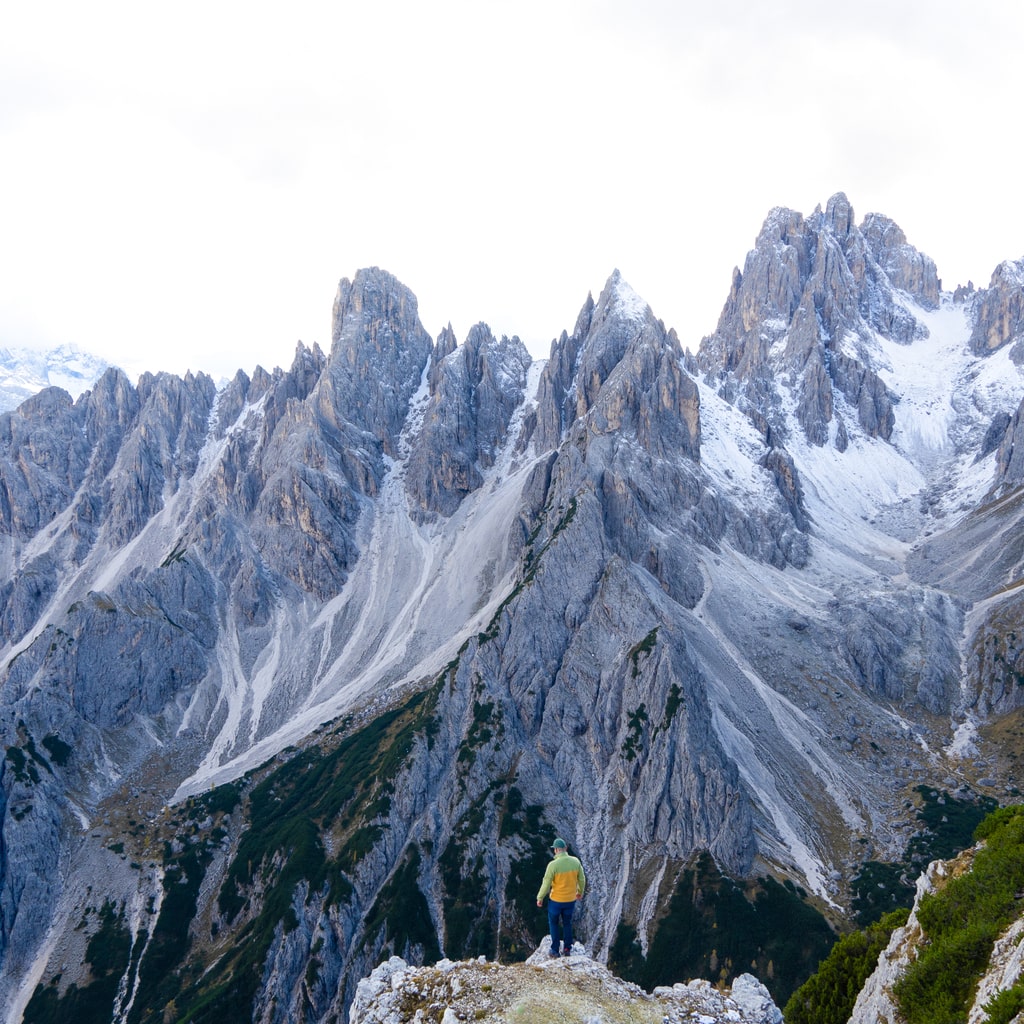
The Cadini di Misurina viewpoint is one of the most iconic short hikes in the Dolomites: a narrow rocky spine facing jagged towers, with a clear view of the backside of Tre Cime di Lavaredo and the deep valley toward Auronzo. It’s short on distance, huge on payoff.
We did this hike in winter conditions, starting from Casello Parcheggio 3 Cime because the access road to Rifugio Auronzo was icy. That added distance and elevation, but the views stayed unreal the entire way. In summer, you normally start at Rifugio Auronzo and follow trail #117 toward Rifugio Col de Varda.
Cadini di Misurina Viewpoint Hike Overview
Summer route (standard)
- Distance: 3.2 km return
- Elevation gain: 210 m
- Time: 1–2 hours
- Lowest elevation: 2,260 m
- Highest elevation: 2,355 m
- Difficulty: Easy (dry, snow-free trail)
- Best season: June–October
- Start: Rifugio Auronzo
- Toilet: Rifugio Auronzo
Winter / icy-road alternative (our route)
- Start: Casello Parcheggio 3 Cime
- Distance: 11.11 km total
- Elevation gain: 596 m
- Max elevation recorded: 2,348 m
- Notes: Expect frozen sections, wind, and a longer day. Choose traction based on conditions.
Exposure + terrain
- Viewpoint type: Narrow rocky ridge with drop-offs
- Surface: Dirt + loose gravel + rock; viewpoint is root-covered rock
- Exposure: Moderate to high at the viewpoint itself
Parking and Access (Rifugio Auronzo vs Winter Starts)
A) Summer start: Rifugio Auronzo (normal season)
- Road open: typically early June to early fall
- Access road: 7 km road connecting SP49 (near Lago di Misurina) to the Rifugio Auronzo parking lot
- Reservation: starting in 2025, an online reservation is required to drive up (vehicle numbers are limited)
- Parking fee: €40 per car, €60 per campervan
- Arrive early: the lot can fill by 9:00–9:30
- Public transport: bus access is possible in season
B) Winter / shoulder season start: Casello Parcheggio 3 Cime (what we did)
If the road is icy or closed, you may need to start lower. This turns the hike into a longer winter outing with more variables: wind, ice, and fast-changing traction.
How to Hike to the Cadini di Misurina Viewpoint (Step-by-Step)
1) Find the Cadini di Misurina trailhead at Rifugio Auronzo
- From Rifugio Auronzo, cross the road to the terrace viewpoint over the valley.
- Left is the Tre Cime di Lavaredo trailhead. Do not take it.
- Go to the right side of the terrace. A few steps after the terrace ends, you’ll see a signed path dropping downhill through grass.
- Follow trail #117 toward Rifugio Col de Varda.
2) The ridge climb (best Tre Cime “backside” views)
The trail dips briefly, then climbs the opposite ridge. Expect a few short steep sections, loose gravel, and often strong wind. Turn around often: the backside view of Tre Cime keeps improving as you gain height.
3) Trail split at about 1 km
Near the top of the hill (around 1 km), the trail splits. Both options reach the viewpoint.
- Left option: more exposed cliff-side line with a big valley view toward Auronzo. Conditions reports since 2023 are mixed (some mention erosion in spots). Treat it as condition-dependent.
- Right option: less exposed and usually more comfortable if you dislike heights or the ground feels sketchy.
4) The viewpoint (around 1.5 km from Rifugio Auronzo)
At about 1.5 km, look for a long rocky outcropping with a thin trail along the top. This is the Cadini di Misurina viewpoint. The last meters are narrow and root-covered. Move slowly and give people space.
Crowds: This spot can be empty or it can have a line depending on time of day. Mid-morning tends to be busiest; mid-afternoon can be calmer.
Safety Rules That Actually Matter Here
- Do not step onto the viewpoint if it’s wet, raining, or icy. The rock and roots become slippery fast.
- Wind changes everything. If gusts are strong on the ridge, stay farther back from edges and skip the narrow spur.
- Footwear matters. Wear proper hiking shoes with grip; loose gravel + exposure is a bad combo with smooth soles.
- Photography discipline: Take your shot, step back, let others pass. Don’t “hover” on the narrowest part.
Optional Extension: Second Viewpoint and Extra Angles
After the main viewpoint, you can continue along the trail for more perspectives. Two common add-ons:
- Short continuation: about 0.25 km each way (around 5 minutes). The trail narrows near cliffs, so use extra caution.
- Second viewpoint: roughly 400 m beyond the main viewpoint, there’s a smaller outcropping that also frames the Cadini peaks nicely.
Best Time for Photos at Cadini di Misurina
- Midday to early afternoon: reliable light and visibility (12:30–13:30 works well)
- Golden hour: dramatic shadows and glow, but plan logistics (especially if relying on buses)
- Busy season strategy: go earlier or later to avoid crowds at the viewpoint
What to Bring
- Hiking shoes (grippy soles)
- Water: about 1 L per person (more on hot summer days)
- Sun protection: sunscreen, sunglasses, hat (fully exposed trail)
- For winter/ice: traction appropriate to conditions and a conservative mindset about turning around
Things to Do Nearby
- Tre Cime di Lavaredo loop (starts from the same parking area)
- Lago di Misurina (easy stop less than 10 km away)
- Lago di Dobbiaco (about a 30-minute drive from Rifugio Auronzo)
Leave No Trace (Dolomites edition)
- Stay on the trail (erosion is real on these ridges).
- Pack out everything.
- Share the viewpoint calmly and safely.
Quick takeaway: In dry summer conditions, Cadini di Misurina is an easy, high-reward hike. In winter or when the road is iced, the approach can turn it into a much longer, more serious day. Either way, treat the viewpoint itself with respect: it’s narrow, exposed, and not worth forcing when conditions are poor.
Last modified: December 31, 2025